Baby Vaccination Schedule: Tips to Prevent Pain & Discomfort

Immunisation is mandatory. Through vaccinations, medical science has managed to control and eradicate many deadly diseases. To ensure the best of health for a baby, timely vaccinations are a must. A record book of vaccinations is usually given by the hospital at the time of discharge. This helps one understand the vaccinations and its schedule. Maintaining the time line, specified in the record book, is important for the vaccination to be effective. When I was discharged from the hospital, with my new-born son Kabir, a similar record book was given to us. In our vaccination record book, both the mandatory vaccinations and the optional vaccinations are mentioned.

Mandatory vaccines are what is recognised by the Indian Govt. as mandatory to be given to every Indian baby, there are many factors considered before this classification is done. So our recommendation will be to get both mandatory and optional vaccines for your baby. We followed the record book to the tee, giving Kabir both sets of vaccinations. A little discomfort is worth bearing ,when it comes to building a long term safeguard against deadly diseases.

You will have a choice between painless and painful vaccines, unlike the popular belief, painless vaccination does not mean that there would be no pain or after effects to the vaccination. Even after a painless vaccination, a child might have fever and other effects. The main difference between a normal vaccination and a painless one is that, a painless vaccine has fewer antigens compared to a whole-cell painful vaccine, also multiple doses of different vaccines can be combined and since the science behind it is constantly improving there could be other differences at the time of you reading this article. We chose the painless injection to reduce Kabir’s discomfort. However, do note that painless vaccinations are far more expensive than the normal one and it is believed that their effect on the body stays for a lesser time. Hence, it’s a personal choice that one can exercise during immunisation.

To ease a child post vaccination is the top priority for parents. At the same time it’s important to note that since the baby’s body is adapting to the injected vaccine, one must let the body heal at its desired pace. Typically the effects of vaccinations can occur up to 2 days, post the vaccination. Asking your paediatrician about the effects to prepare oneself, will ease much of the stress.

For our son Kabir we used the following steps:

  1. To ease discomfort and fever, we orally administered Baby Crocin drops, especially during the night. Every baby is different and hence the medication and dosage should be recommended by your medical practitioner.
  2. We didn’t massage the area where the vaccination was injected. Also we kept the area covered by making him wear loose clothes. Any pressure on the area will trigger pain .
  3. In case of a swelling in the area, a cold pack is recommended. Take ice in a clean cloth and gently apply on the area. It will help reduce the pain and the swelling.
  4. We kept Kabir engaged with toys and activities. Speaking and playing with the child keeps it distracted from the localised discomfort.

There is not much that can be done by the parent in such situations. The above points should significantly reduce any discomfort. To assist you further, I have shared Kabir’s vaccination record book. Feel free to take a look at it and tally your own records. I reiterate, proper recording of vaccination data is a must. Plan and maintain the vaccination timeline.

MomComIndia is a platform for happy parenting. Do share your vaccination stories and challenges. Together we can lend a helping hand to each other. The above content is also available in a video format (link). Comments, questions and feedback are most welcome. Let’s enjoy simplified parenting.

इस आर्टिकल में बच्चों के टीकाकरण से जुडी जानकारी दी गयी है | इस आर्टिकल की जानकारी हिंदी में पाने के लिए नीचे दिए वीडियो को देखें 

Diaper Rash in Baby: Prevention & Treatment (Easy Home Remedies)

A fairly common problem, it might start with a tiny pimple like rash or just plain redness for the baby, however diaper rash is not to be taken lightly. The discomfort in the baby makes most parents nervous. I received a lot of queries on this subject from the readers of my blogs. Being a mother, I understand how it can turn a happy baby into an irritable one. But it doesn’t have to be this way. Preventive measures and timely treatment can make diaper rash disappear.

Let’s first understand, what causes a diaper rash. Every baby pees and poops a lot. Of course they are not toilet trained, hence for convenience a baby is often in diapers. The urine and the stool, comes in contact with the skin. If a baby’s diaper is not changed often, the germs in it, cause infections, resulting in diaper rash. Also poor quality diapers have harsh chemical linings, this too can start to make the skin sensitive, leading to a diaper rash. A baby suffering from loose motions is more likely to suffer from diaper rash. The above cases are mostly about disposable diapers, however cloth diapers that aren’t washed and disinfected properly, can lead to diaper rashes as well. Hence as preventive measures, whether it be disposable or cloth diapers, we need to follow the following steps-

Step1: Change the baby diaper, every 2-3 hrs or whenever you feel the diaper is heavy. It’s very difficult to gauge how much urine a diaper has absorbed, hence its best to be safe. For my son, Kabir, we used a diaper that had a wetness indicator. The diaper has a line, that turned blue, indicating that it’s time to change the diaper. This has been a huge saviour for us.

Step2: Also it’s important to note that some babies pee more frequently at night so we made it a point to change our son’s diaper at least twice during night. We did this during his feeds. This helped him to get a restful sleep, as he didn’t wake up crying due to a wet diaper.

Step3: Be aware of the quality of the diaper being used. If your baby is frequently suffering from diaper rashes, try changing the brand of the diaper.

Step4: For cloth diapers, use a hot wash cycle and periodically use the cloth diaper disinfectants to maintain a hygienic use.

Step5: In case of a loose motions, change the diaper immediately after every passing of the motion.

Step6: Proper cleaning and airing of baby bottom is must. Yes, wipes are convenient. We too used them when we travelled outside the home. However at home, it is best to clean the baby bottom with water. You may wipe it with some cotton dipped in water. In cold months, use lukewarm water for the same.

Step7: After the wash, pat dry the area preferably with a Bamboo Washcloth and let it be for a while. Leaving the baby without a diaper for some time, lets the area breathe. During winter months, just cover the baby’s legs with a blanket or a muslin swaddle, and let the baby bottom dry naturally. Only after the baby bottom is dry, make the baby wear the next diaper.

Step8: Use a good diaper rash cream every time you change your baby’s diaper. This creates a thin protective layer between the baby skin and the diaper, protecting the skin from chemicals and bacteria which creates rash.

Step9: Leave the baby without a diaper, at-least for a few hours a day. You will notice that your baby loves it. A baby often feels very restricted with a diaper. This will be hard to follow in winter months, but is a perfect solution for summers.

In spite of all the preventive measures, should your child still suffer from a diaper rash, here’s is what to do-

Medical Help: Deal with the rash as soon as it appears. Do not delay. It can worsen very quickly. Most rashes can be cured at home however some may require medical attention, don’t hesitate to visit the doctor if you feel a rash requires the attention of a medical practitioner.

Diaper Rash Cream: Keep a good diaper rash cream at hand. A good rash cream builds a protective layer between the baby’s skin and germs. It immediately soothes the skin sensitivity. We used Aquaphor Rash cream in case we saw a diaper rash. Often we applied it as a preventive measure as well. Butt Paste Rash Cream is another of our favourites. This is a thick cream and is more suitable for winters. Occasionally you might choose to use coconut oil to soothe the baby’s private area.

These solutions have been tried and tested at our home. From one parent to another, I always wish for a happy upbringing. If you have used any home remedies, with success, I would love to hear about them. Your comments, questions and feedback, are always welcome. Do feel free to share this article with more parents. Should you want to watch this content in a video format, here’s the link. Enjoy simplified parenting.

♥ इस आर्टिकल में बच्चों में होने वाले डायपर रैश के बारे में बताया गया है | इस आर्टिकल की जानकारी हिंदी में पाने के लिए नीचे दिए वीडियो को देखें 

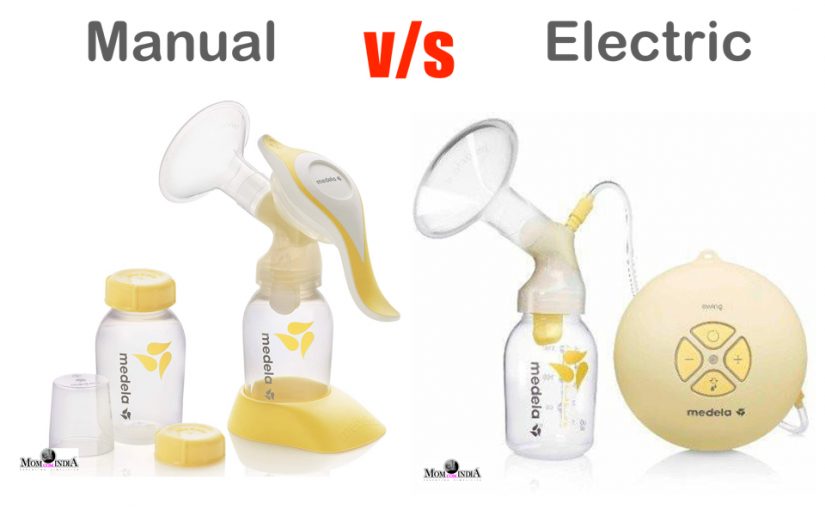
Manual v/s Electric Breast Pump | Which One Should You Buy?

A breast pump is a device that helps a mother express her milk in a bottle ,for later use. The breast pump is often considered to be a tool for the working mother. For a mother who is away from the little one and yet wants the nutrition of the breast milk to enrich her baby. It’s all possible because of the breast pump. However, it not restricted to that. A breast pump provides the opportunity to measure and plan a baby’s feed, often running a feed in advance. It lets one’s spouse or caregiver take care of a few feeds, while the mother can rest. This is universal, for both a stay at home mom or a working mom. That said, most parents wonder which breast pump to choose- manual or electric.

Like always, I prefer to not be merely factual about parenting. My writings germinate from my personal learnings as a mother. Hence, for this as well, I will take you through my experience with both the manual and the electric breast pump.

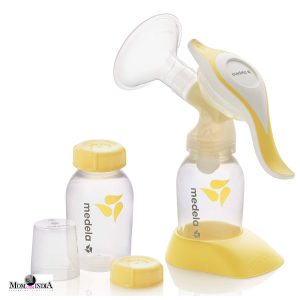
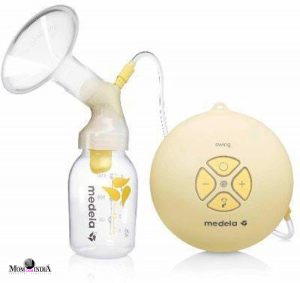
I first chose to use the Medela Harmony Manual Breast Pump. The decision was taken to ease my stress of immediate lactation, when the baby demands for a feed. There are certain times in the day that I would lactate more. These were usually the time when my body was well rested. At approximately 1am,5am and 10 am, I would express far more than throughout the day. I would express and store it, so that when my son ,Kabir, needed a feed I didn’t have to worry about my current supply of milk. The pressure of not having to express on the spot gave me a huge sense of relief. And the Medela Manual Breast Pump worked well to meet my demands. However, I decided to also purchase a Medela Mini Electric Breast Pump. Using the two devices often gave me a first hand understanding of the pros and cons of each.

Manual Breast-Pump

A Manual Pump came with – Personal Fit breast shield,component connector,valve membrane, bottle,bottle stand,multi-lid,handle (to pump),diaphragm/stem with O-ring and a valve head. It was far cheaper than an electric pump. Since I was pumping manually, the pace of the pump depended on me. Also in case of no electricity or travel, I was not worried about finding a power source. However, the time taken to express milk could be between 10-40mins, as my hands would get tired pumping manually. Especially late at night, manual pumping became a task. Hence, I decided to keep the manual pump as a back-up or to be used during travel, and simultaneously invested in an electric pump. Most Manual breast pumps have a similar design however I have personally tried Madela, Philips, Trumom & have found them quite effective.

Electric Breast-Pump

The Medela Mini Electric Pump arrived soon after. The pack had the following components-bottle stand, Instructions for Use, PersonalFit connector, valve membranes , main adapter, disc, lid, motor unit, PersonalFit Breast shield M (24 mm), bottle 150ml, protective cap. And almost immediately it became my best friend. Yes, there was a significant difference in the price as compared to the manual pump. However, it was far more efficient. The time taken to express the same amount of milk was 10-15mins. My hands were free and I could easily engage my baby ,while the electric pump collected the milk in the given bottle. Of course the dependence to a power source remained. Though this model of breast pump could also operate with batteries but it’s most effective when connected to a power source.

Storing expressed breast-milk

Both the Manual & Electric Breast pump came with a storage bottle which can be used to express and store milk. For storage of breast milk, I usually kept it deep inside my fridge. The lid of the storing bottle was tightly closed. And the cleanliness in the fridge was constantly ensured. The breast milk I expressed , was used up in a span of 24hrs. However, should you want to store it for longer, do use the freezer.

Warming the breast-milk

Before feeding the stored breast milk to your baby, the milk has to return to room temperature. If one notices, the breast milk in its natural state is neither hot nor cold. I used a bottle warmer for the same. I would set the temperature and the breast milk would be ready in a jiffy. However, if you don’t have a bottle warmer, one can fill a pan with hot water. The cold bottle of breast milk, still tightly shut, can be dipped into it, till it returns to room temperature.

Cleaning the breast-pump

The cleaning procedure for both is fairly simple. It’s as easy as cleaning and sterilising the feeding bottles. I used to clean my pump after every feed to maintain the hygiene standards at its peak.

As mentioned before the breast pump gave me a lot of freedom to plan the feeds. However, I also witnessed the beautiful bonding that my husband enjoyed while feeding Kabir. With a breast pump, he too played an active part in the process of feeding our baby. That to me is priceless.

I understand that you may have more queries. To hear from you, whether as comments, questions or feedbacks, brings me happiness . I strongly recommend that you watch the video format of the article, to see how I assemble the breast pumps. The link is here.

Do share the article with more parents to ease their parenting journey. Together, let’s enjoy simplified parenting.


Breast Pump | Everything You Need To Know

Mother’s milk is an elixir for the baby. Rich in nutrients and easy to digest, it builds immunity. Nothing can truly substitute breast milk. WHO and all research data, vouch for it. Every paediatrician will insist that a new-born be exclusively breast fed for six months. Even after the period of six months, at least one breast feed in a day is advised. However, a mother, especially a working woman, might not be physically present all the time. Breast Pump is a saviour in such cases, removing the need for early weaning of the baby from mother’s milk. In my personal experience, the breast pump has been a boon. Hence, after receiving multiple questions about breast pumps, I decided to bring to you a comprehensive understanding of it.

What is a Breast Pump?

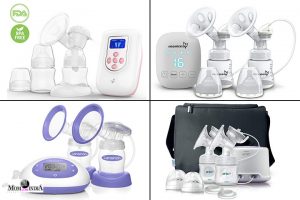
This is the most basic of all questions. Simply put , it is a device that aids a mother to express her milk and store it for later use. There are two types of breast pumps- manual and electric. In a manual pump, the milk is expressed by manually pressing the pump multiple number of times. For electric pumps the pumping action is done automatically.

Why Should I use a Breast Pump?

Though breast pump is not a necessity if the mother is always in close proximity to the baby, it makes the experience of breast feeding very convenient. Like mentioned earlier, if you are a working mother, it lets you express and store your milk. Therefore, your baby gets the benefits of breastfeed, even when you are not physically present next to the baby. I have personally used a combination of direct breast feeding and expressing for my son. Especially at nights, when a baby is tired and asleep, sucking is a hard task for it. The baby falls asleep after suckling for a little while, yet it’s hunger is not satiated. Hence, it wakes up again and again. This results in disturbed sleep for both mother and child. However, breast milk in a bottle is easier to suckle. One can also easily measure the amount the baby drinks. Furthermore, it also gives the partner or caregiver, the opportunity to feed the baby ,while the mother can have an uninterrupted sleep.
By keeping a combination feed, one is also keeping into account any emergency or special situations that may occur. Sudden switch at that time might be rejected by the baby. The case of nipple confusion can easily be avoided by using the bottle that comes with the breast pump.

A happy child is one that is satiated. Most of the time a child cries out of hunger. While feeding breast milk from a bottle, one can easily keep a check on the quantity of milk that the baby drinks. One can adjust the feed in accordance.

How often should I use a Breast Pump?

It’s recommended that one uses a breast pump every 2-3 hrs. Lactation in a mother is all about demand and supply. Regularly expressing your milk helps to maintain the milk supply. A mother’s body will recognise the demand and produce in accordance.

Which breast pump should I use- Manual or Electric?

This is a personal choice. To take you through the pros and cons, though an electric pump is expensive, it’s far more efficient. The time needed to express in a manual pump can range between 10 – 40 mins. In an electric pump the same quantity can be expressed in 10-15 mins.

Which brand of breast pump should I use?

I have personally use Medela. To begin, I had purchased a manual pump and later decided to upgrade to an electric pump. It’s a renowned brand and is easily available. Other than that there are brands like Philips Avent.

Where do I buy it from?

Breast Pumps are easily available at any baby store. However, I chose to purchase mine online. The reason being – a better deal in pricing. I saved Rs. 2000 on MRP , while purchasing my electric pump. Also the convenience of delivery seems lucrative to me.

I hope this helps you decide and start your breast pump journey. In a separate article I have covered the specifics of how I used an electric breast pump, stored and thawed my milk. The link to it is here. The content for this article is also available in a video format (link). I would be happy to answer any questions that you may have after reading this article. Should you want to share your parenting journey, please feel free to do so in the comments section. Your feedback would bring in a lot of insights to me. Mom Com is a community built to support parents. Enjoy simplified parenting.


How To Choose The Right Formula Milk For Your Baby

Exclusive Breast Feed for the first six months is the best for a baby. WHO, Research, Your Paediatrician and all baby formula manufacturers will highlight it. The nutritional benefits of breast milk are manifold. Yet situations can be such that a parent decides to introduce formula to the baby. Sometimes it’s due to a lactation deficit and sometimes one might choose to supplement just one feed with a formula. Whatever be the reasons, I understand. And along with this decision comes the question, “which brand of formula should I choose for my baby?”

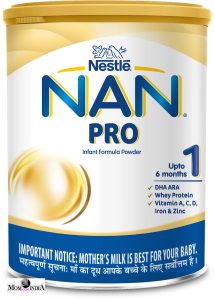
To answer this question better, I will take you through my personal journey of finding the right formula for my son. I introduced formula early for both reasons mentioned above and decided to supplement one feed with formula. Cow’s milk or likes shouldn’t even be considered as a choice for at least 1 year after baby birth. The proteins in cow milk is difficult for a baby to digest. Formula on the other hand has been developed to be closest to breast milk. We looked into the options available and chose the popular NAN PRO 1.


NAN PRO, is easily available and most people choose it. Since we were just looking to supplement one feed, this was an informed choice, we introduced Nan Pro 1 when Kabir was around 40 days and used it for almost 2 months. We were fine with it, till we noticed that Kabir was having a lot of spit up. Baby’s regurgitate a bit of their feed with burping. But in our case he was vomiting out quite a bit. Also his potty cycles were affected. He was pooping once in 3days. Though this is normal of a baby, as parents we decided to change our formula and see how it impacts.


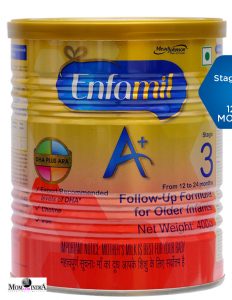
ENFAMIL was introduced to Kabir. It’s a well-known but expensive formula. Immediately things started looking better for Kabir. ENFAMIL is light so it was easily digested. His potty cycles became regular and his spit up was reduced by at-least 50%. However, he was feeling hungry much more frequently than when he was on NAN PRO 1 and there was still spit up. We decided to try another brand, to understand what suits our baby best.


SIMILAC ADVANCE, was the choice. It too is well renowned and cheaper than ENFAMIL. On introducing this to Kabir, we saw that it worked for him. The spit ups were lesser than ENFAMIL and that too not on a daily basis. He was satiated for 3-4 hrs and his potty cycles continued to be normal. We stuck to SIMILAC for the rest of our formula feeding journey.


While choosing a formula for your baby, know that every child is different. Some of you may find that another brand suits your baby better. However, we can only review those that we have used. Of the three brands listed above, your baby might have a completely different experience. All the brands listed are available online and with local chemists.

That said, I reiterate the importance of breast feed. If you are struggling with lactation issues, here’s the link to our home remedies to increase the supply. To understand how to make formula, we have listed the procedure in detail (link). Should you chose to watch this content in a video format, the link is given below.

I greatly appreciate your support. MomCom India is your platform to discuss and forward the parenting journey. I invite you to participate in it with your comments, queries ,feedbacks and shares. Together we bond as happy parents. Enjoy simplified parenting.

इस आर्टिकल में बताया गया है कि बच्चों के लिए फार्मूला लेने के लिए किन बातों का ध्यान रखना चाहिए और मेरा क्या एक्सपीरियंस रहा कबीर के साथ | इस आर्टिकल की जानकारी हिंदी में पाने के लिए नीचे दिए वीडियो को देखें